 The 40304 Digital Control “Chip” is small. About an inch square. It has one pair of wires to go to the slot guide already attached and two pairs of sockets. More about the second pair of sockets later. Installation was easy. I removed the body from the chassis, disconnected the motor wires from the slot guide, pulled the little metal connectors (the “hats”) off the wires and plugged them into the motor wire sockets on the chip. Little plastic pegs hold the wires in place. Then I put the “hats” on the wires that come from the chip and plugged them back into the slot guide. You do have to watch polarity though, or the car won’t work. Simple, and it took a couple of minutes. No soldering and except for a screwdriver to remove/replace the body, no tools either. There’s a two-sided pad (like servo-tape) with each chip to stick it the chassis. Very soon, NINCO will add a post to all chassis to anchor the chip.
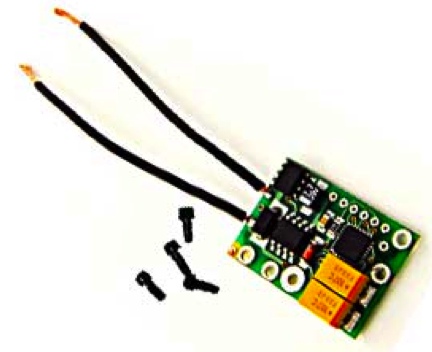
To install in cars from other manufacturers, just remove any pieces from their slot guides, bare the wires and attach to the chip as above. Remember, you can install a chip in an analog car, not another manufacturer’s digital car. A “chipped up” car will still work on an analog layout so you don’t have to remove the chip once installed.
Programming the car chip was simplicity itself. Remove other cars from the track put your car on the track Pick up one of the controllers that you want to use. Just press and hold the Lane Change button on the controller. In a couple of seconds, there’s a beep. That’s it! The chip’s memory will hold its program to that controller until you reprogram it to another controller. You can also program other cars to the same controller, so team drivers can switch cars during a race without having to continually reprogram or change controllers.
That extra pair of sockets? That’s for cars with lights. Attach the wires the same way as the motor wires... and secure them with the little plastic pins.
No comments:
Post a Comment